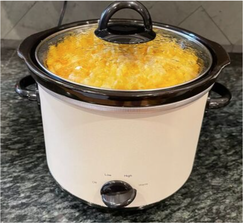
 I cook Mac n Cheese in the Slow Cooker when I have a lot of other dishes going on at the same time. This is a recipe I’ve used for years, and while I continue to test new slow cooker mac ‘n cheese recipes, this one is always a crowd favorite. Plus, you can set it and forget it and let it cook while working on everything else. I started making this when all the older kids were little, but everyone always eats it - not just the kids.
Slow Cooker Mac ‘n Cheese INGREDIENTS:
PREPARATION:
0 Comments
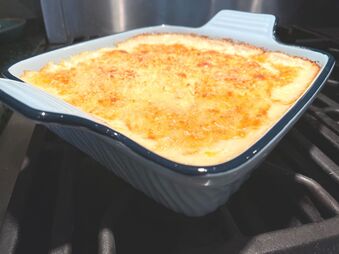 J. Alexander’s Not Your Ordinary Macaroni and Cheese I have fond memories of business travel and dinners in certain cities where my colleagues would always want to go to J. Alexander’s. I remember the mac n cheese was yummy, so when I saw that they generously shared their recipe with The Atlanta Journal-Constitution, I knew I had to give it a try. This recipe was easy to follow, and easy to make (especially when using pre-grated cheeses). And it was indeed very yummy, and very rich (I did an extra ride on the Peloton to work it off). But if I am honest, it was too good for my boys. I knew they wouldn’t appreciate the nuanced flavors of all the cheeses. My older son liked the panko on top and wanted more of that (!), and my husband liked it but thought it tasted even better cold the second day. Is it healthy? No way. Is it comfort food? Absolutely. Will I make it again? Maybe. I’ll probably save this one for guests. J. Alexander’s Not Your Ordinary Macaroni and Cheese (Serves 8) INGREDIENTS: · 2 tablespoons unsalted butter · 2 tablespoons olive oil · 1/4 cup diced white onion · 1/2 teaspoon chopped garlic · 1/4 cup plus 2 tablespoons all-purpose flour · 1 cup chicken broth · 1 1/2 cups heavy cream · 1 3/4 cup coarsely grated Gruyere, divided · 1 1/4 cups finely grated Parmesan · 1 tablespoon lemon juice · 1 teaspoon granulated sugar · 1/2 cup plus 2 tablespoons sour cream · 1 teaspoon Tabasco · 1/4 pound dry small elbow or shell macaroni · 2 tablespoons panko PREPARATION: 1. In a large saucepan, melt butter over medium heat. Add olive oil, then add onion and garlic and cook until onion is soft, about 4 minutes. Add the flour and stir to make a creamy paste. Reduce heat to low and cook 5 minutes. Slowly whisk in chicken broth until the mixture is smooth. Cook 1 minute or until the mixture thickens. Slowly whisk in cream. Add 1 1/2 cups Gruyere, Parmesan, lemon juice and sugar. Remove from heat. Allow to rest 10 minutes, then stir in sour cream and Tabasco. 2. Heat oven to 350 degrees. Lightly grease a 9-by-13-inch baking dish. 3. While sauce is resting, cook pasta according to package directions. Drain and add to sauce, stirring to combine. Pour macaroni and sauce into prepared baking dish. Top with remaining 1/4 cup Gruyere and sprinkle with panko. Bake 30 minutes or until everything has heated through and the top begins to turn golden brown. Allow to rest 10 minutes before serving. 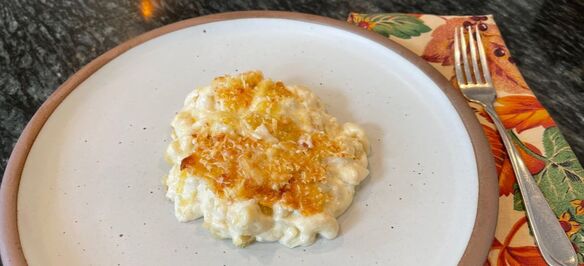 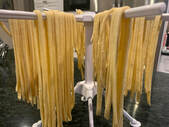 So pasta is beige, and thus is very popular in my house. But sometimes, you’ve gotta spice it up. I try to do that with homemade pasta. It’s really easy to make the dough, and then run it through the attachment to my Kitchen Aid mixer. Plus - since it is fun I can usually get some little helpers. I learned how to make pasta at a cooking class a very long time ago. Since then I feel like I’ve perfected the technique. Here’s a few tips before you get started: 1. For the flour, use an all-purpose, unbleached flour. It should be at least 4g of protein per ¼ cup. I like to use King Arthur or Hodgson Mill. 2. For the Eggs: a. For each egg, you’ll need ¼ cup of flour. b. Estimate 1 egg per two modest servings. I use 1 egg per person I’m serving. And I throw in one extra since I have a teenager. c. Use Large eggs, but NOT extra Large. 3. Rule of thumb: 4 Large Eggs = 2 batches of 16 oz pasta 4. For the pasta attachment, I’ve had better success with a non-Kitchen Aid branded one than I did with their set, and its less expensive. Here’s the link to the one that I use. Making the dough: 1. Beat the eggs in the mixer bowl using the batter beater attachment. 2. Then gradually add in the flour. 3. When you have kneaded it in the mixer for 5 minutes and it seems “close” then take it out on the counter and finish kneading it by hand on the counter for 4 minutes. Lightly flour your hands to do this. The dough should have enough flour that it is barely sticky. 4. Do not add too much flour!!! If too much flour is added, it will be difficult to roll. Rolling the Pasta: 5. Cut off a lemon-sized piece of dough to start pushing through the flat rollers on the pasta attachment. 6. Place an inverted bowl over the remaining dough so it doesn’t get dry. 7. You’ll run it through the smooth rollers first to finish kneading it and get to your preferred thickness. Start with the rollers at their widest setting – this will be a 1 or a 10 depending on your roller attachment. You will pass the dough through at this widest setting at least 10 times. At that point it should be stretchy like a rubber band without tearing it. a. After it goes through the rollers each time, fold the dough in half and press it together. Lightly (!) flour the outside so it doesn’t stick to the rollers if it feels sticky. 8. Next, you’ll set the rollers at their next thinnest setting, and pass the dough through. You will no longer fold the dough between passes. Then continue to move to the next thinnest setting until you get to your desired thinness. 9. The next step is run the pasta through the spaghetti or fettuccine slicers, and then to hang the noodles on a pasta drying rack. Boiling the Pasta: 1. Bring a large pot of salted water to a riling boil. 2. Stir in the pasta and cook until al dente. 3. If the pasta is fresh and right off the rack, it will cook in just 1-3 minutes. 4. If the pasta is dry, it will cook in 4-7 minutes. Storing the Pasta: This is not usually an issue in my house since it all gets eaten right away, however…. After the pasta is dry, you can store it in an airtight container or zip top bag. It will keep for 2-6 months, or up to 8 months in the freezer. In this case - For the adults, I sauteed some onions, tomatoes, garlic, peas and spinach for a sauce.
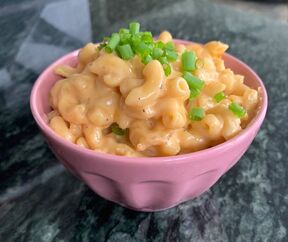
The kids took it straight with sauce and fresh parmesan. Let me know if you have any questions - I'm happy to help! 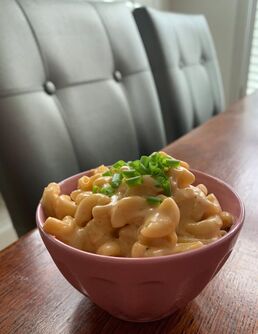 At the moment, my youngest has issues with food that has color. The exceptions are slices of green peppers, edamame, and ketchup. Yet he loves sushi, so I can't explain it. But with such a limited diet I need to make sure that when he does eat that he gets enough calories. Mac and cheese checks both boxes - beige and caloric. Making it from scratch cuts down on preservatives and unwanted chemicals. I've tried a lot of mac and cheese recipes, and I'll share a few here on the blog. This one is the easiest on a weekend. With a little planning you can make it for lunch or dinner in the slow cooker. A word of warning - it makes a lot(!) of mac and cheese. It is best eaten warm if you can coordinate that with your schedule. If not, you'll need to store it in the fridge until later. It warms up fine, but is a bit dense as a leftover since the noodles have absorbed most of cheese and liquid. This recipe is from Damn Delicious, and is a favorite in our house. As she says on her blog, "The BEST mac and cheese EVER!!!! No boil. No stress. Everything gets thrown right in. Even the uncooked noodles!!!" She says to cook it in a 4Qt slow cooker. I only have a 7 Qt one, and it worked just fine on the low setting. INGREDIENTS:
 |
AuthorKris Delaney is a marketing executive, foodie, travel enthusiast, and book nerd based in Atlanta, GA. Archives
December 2022
Categories |


 RSS Feed