 So I strongly suggest getting a bit of sourdough starter to get started. As I mentioned in an earlier post, I got mine from the Georgia Sourdough Company, via a regular order from Garnish and Gather. Or if you know a crazy baker like me, we always have some starter to spare. So this post is NOT about getting your starter started, but keeping it alive. I’ve read some articles about this where the started has been passed along through the decades, so it can’t be too hard, right?
In the beginning I was afraid that keeping the starter alive would be very time consuming. Even though there are only two ingredients, there’s a bit of exacting measurements involved and it is a bit messy. But it has become very routine and much easier as time has gone on. What is the Starter, exactly? The sourdough starter is a combination of flour, water, wild yeast and bacteria that is used to make bread rise when baking. And you want the starter to be “strong” and very active and fluffy at the top before making bread. Bread made this way is referred to as “naturally leavened”. And why exactly do I need to “feed” it? Once the water and flour are initially combined, the wild yeast and bacteria that are found naturally on the flour and in the environment will start to multiply. As they multiply they "eat" the flour in the jar. So once they have “eaten” all of the flour available to them, they must be fed again to keep growing and multiplying. So how do I feed it? Here you have two options – you can store your starter at room temperature, or you can store it in the fridge. I keep one of each, just to hedge my bets. If you are storing the starter at room temperature:
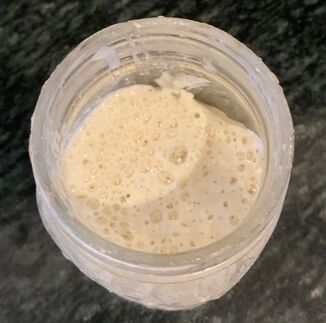
A few tips I've learned along the way: 1. I have transitioned to using the wide mouth, 2 cup mason jars for my starters. They are the perfect size, easy to access with the wider mouth, and fit nicely in the fridge. 2. Once every two weeks or so I will transition my starters into clean mason jars, and put the old ones in the dishwasher. This is more about aesthetics than anything as the jars can get pretty messy. 3. After feeding the starters but before covering them, I wipe down the outside of the jar, as well as the inside of the jar to keep it tidy and so I can easily see how the starter is doing. 4. Once you are done feeding the starters, wash all spoons and the countertop immediately. If you let the starter dry on them, it gets like concrete. It’s just too hard to get it off once its dry, so take care of it asap. 5. One way to determine if your starter is ready is to do the float test. My starter did not pass the float test until I found a way to keep my starter warm, as I shared in a previous post. My house was just too chilly. The float test is easy - fill a jar or cup with room temperature water and gently add a tablespoon of the starter into the water. If it floats, you are ready to go. If not, then keep feeding it and trying to get it more active. Comments are closed.
|
AuthorKris Delaney is a marketing executive, foodie, travel enthusiast, and book nerd based in Atlanta, GA. Archives
May 2023
Categories
All
|
 RSS Feed