THE DISH WITH KRIS
  • Home
  • Busy Mom Dinners
  • Easy Lunches
  • Travel Itineraries
  • Travel Blog
  • FULLY BOOKED!
  • Breads & Baking
  • Veggies & Bevvies
  • Beige Food for My Boys
  • Links
  • Other "Dishes" (art, fashion, etc...)
  • About Me

Busy MOM DINNERS

Chicken Piccata

6/27/2026

 
Picture
The weeknights when we all get home late and tired are the hardest ones to decide what to make for dinner. Who wants to be bothered?  But this recipe only takes 25 minutes. Total.

You can make this and feel a little fancy, and you’ll be done and eating before your Door Dash alternative would have even got picked up. Which leaves time to properly set the table and actually be fancy. Enjoy, and you’re welcome!
Chicken Piccata

INGREDIENTS:
1 lb thinly sliced chicken breasts
1/2 cup flour
1/2 tsp salt
1/2 tsp ground black pepper
1/2 tsp cayenne pepper
2 Tbsp olive oil
1 Tbsp capers, drained
1/2 cup white wine
1  lemon, juiced (approx. 1/4 cup)
1 lemon, sliced into wheels

1/4 cup water
3 Tbsp cold butter, salted
3 Tb fresh parsley, chopped


PREPARATION:
Step 1:
In a shallow bowl, mix the flour, salt, and pepper and cayenne. Dredge each piece of the chicken through the mixture to coat evenly,  and set aside.


Step 2:
Heat the olive oil over medium high in a large pan. Add the chicken. Then reduce the heat to medium. Cook the chicken for 5-6 minutes on each side to brown. The chicken is done cooking when the internal temperature is 165F. Transfer the chicken to a plate.

Step 3:
To the same pan, add in the capers and cook for 1 minutes. Then add in the wine. Stir to scrape up any browned bits from the chicken, and smoosh the capers to flatten them a bit.

Step 4:
Add in the lemon juice, water, and butter to the capers in the pan. Stir and cook until it comes to a boil. Then reduce the heat to low and mix in 2 Tbsp of the parsley, and add back in the chicken. Heat for 2-3 minutes to allow the sauce to thicken and the chicken to heat through.

Step 5:
Serve with the additional parsley, and lemon wheels over pasta, rice, and/or a nice arugula salad. Enjoy!

Creamy Tuscan Chicken

5/30/2026

 
Picture
I am always looking for recipes that are easy to make and can incorporate something really good for you - like spinach.  This recipe reminds me of Marry Me Chicken but was even easier. I served it on top of mashed potatoes, but a nice fat noodle like pappardelle or tagliatelle could work too,. And the leftovers were even yummier. Enjoy!
Creamy Tuscan Chicken

Ingredients:
  • 4 chicken breasts
  • 1 tsp Italian seasoning
  • 1tsp Kosher salt
  • 1/2 tsp black pepper
  • 1/2 tsp garlic powder
  • 1/2 tsp onion powder
  • 3 Tbsp olive oil
  • 3 Tbsp butter
  • 1/2 cup diced yellow onion
  • 5 garlic cloves, minced
  • 1/2 cup sun dried tomatoes - sliced
  • 2 Cups baby spinach
  • 2 Cups heavy cream
  • 1/2 cup freshly grated parmesan cheese


Preparation:
Step 1:
Season the chicken with the Italian seasonings, salt, pepper, garlic and onion powder

Step 2:
Heat olive oil in a skillet and sear the chicken until golden on both sides (about 6 minutes per side) , then add 3 Tbsp of butter and coat the chicken. Remove and set aside.

Step 3:
In that same pad, saute the onion, sun dried tomatoes, and garlic.

Step 4:
Add the spinach, and stir to wilt.
Add in the heavy cream and parmesan, and stir until smooth.

Step 5:
Return the chicken to the pan and spoon the sauce on top.

Step 6:
Serve over tagliatelle noodles, or with mashed potatoes.

Lemon Pepper Chickpea Skillet

4/17/2026

 
I have a young athlete in my house who is obsessed with protein, and I should be eating more protein as well. This recipe really hits that target and it literally take 8 minutes total to make it. And if you add another protein such as chicken, then this is a home run. This made a lot of food, so my lunch the next day was pretty awesome a well. Enjoy!
Lemon Pepper Chickpea Skillet  (with optional protein)

INGREDIENTS:
  • 2 Tbsp unsalted butter
  • 2 cloves garlic, minced
  • 2 tsp lemon pepper seasoning
  • ½ tsp salt
  • ½ tsp mustard powder
  • 2 Tbsp all-purpose flour
  • 1 cup vegetable broth
  • 2, 15 oz cans of chickpeas, drained and rinsed
  • 1 Cup heavy cream
  • ½ Cup grated parmesan
  • ¼ Cup fresh parsley, chopped
  • Lemon slices for serving
  • Salt & pepper to taste

PREPARATION:

Step 1:
Melt the butter in a large saucepan over medium heat. Add the minced garlic, the lemon peppers seasoning, and the salt and the mustard powder. Cook for 1-2 minutes until fragrant.


Step 2:
Stir in the all-purpose flour and stir until combined. Then add in the vegetable broth and bring it to a gentle simmer until the sauce thickens. Then stir in the chickpeas, cover, and let simmer for 5 minutes.

Step 3:
Remove the pan from the heat and stir in the heavy cream, the grated parmesan, and the chopped parsley. Garnish with the lemon wheels and some freshly ground black pepper.

OPTIONAL:
You can easily add to the protein punch of this meal by adding chicken, salmon, or shrimp. In this case, I made my recipe for Grandma's Chicken, and used plan breadcrumbs seasoned with lemon pepper seasoning.


One Pan Creamy Tagliatelle

3/26/2026

 
​This recipe for One Pan Creamy Tagliatelle could not be easier.

The best part? This recipe maybe takes 20 minutes total including the time to prep it.

And please don't tell my kids there was spinach in there - they had no idea and loved it.

The extra bonus point is that it cooks all in one pan which makes for a much easier cleanup. 

This is a perfect meal for when you get home lack from a soccer game or baseball practice - it's easy peasy, and a crowd pleaser. And if you need to add some protein, you could easily add some rotisserie chicken or cooked shrimp or an added boost. OR, you could very easily cut this recipe in half to cook for just two, or have some for lunch the next day. Enjoy!

​One Pan Creamy Tagliatelle

 
INGREDIENTS:
  • 1 lb tagliatelle pasta
  • 24 cherry tomatoes, cubed
  • 1 red onion, thinly sliced
  • 2 handfuls of fresh spinach
  • 4 cloves of garlic, diced
  • 2 Tbsp tomato paste
  • 4 Tbsp Olive Oil
  • 2 tsp Italian herbs
  • 200 ml cream
  • 500c– 550 ml vegetable broth
  • Grated parmesan cheese, for topping and serving
  • Salt & pepper to taste
 
PREPARATION:
Step 1: In a large pan, place the tagliatelle, cherry tomatoes, onion, spinach, and garlic.

Step 2: Drizzle with olive oil, add the tomato paste, Italian herbs, cream, and vegetable broth.

Step 3: Cover and cook over medium for 15 minutes, stirring a few times. Add a bit of broth if you see that it is getting too dry. 

Step 4: At about 15 minutes, or once the pasta is creamy and tender, plate and top with the parmesan cheese.

Crispy Thai Beef & Snow Peas

8/14/2025

 
Picture
This is another 25-30 minute meal that is a winner in our house. This recipe serves 2-3 people, so you'll need to double it if you're cooking for a family of four with big appetites. Or if you want seconds and/or leftovers.

This recipe is great because everybody loves it, and it is easy to make at the end of a long day. It is an easy win!


Crispy Thai Beef & Snow Peas
served over gold turmeric rice
 
INGREDIENTS:
  • 12 oz ground beef
  • Beef Starter: 1/4 c onion, 1 Tbsp diced ginger
  • Thai Sauce Starter: 2 Tbsp tamari, 1 1/2 Tbsp light brown sugar, 1 Tbsp fish sauce, 2 tsp red curry paste
  • 1 lime
  • 1 Cup snow peas
  • 3/4 c jasmine rice
  • 1 tsp turmeric
  • 1 Tbsp cilantro
 
 
PREPARATION:

STEP 1:
In a pot that will hold 2 cups of rice, heat 1 Tbsp of olive oil over medium. Add the tumeric and the rice and toast for 2-3 minutes. Then add 
 1 ½ cups of water & a pinch of salt and bring to a boil. Once it boils then reduce the heat to low, cover the pot, and cook for  12–15 min.  

Step 2:

Trim snow peas and slice into 1–2" pieces. Put to the side.

Step 3:

In a large sauté pan, heat 1 Tbsp oil (2 Tbsp) over medium-high.
Pat ground beef dry, then add the beef to pan and flatten into an even layer, and cook for 4–5 min without stirring to crisp the bottom. Keeping beef in the pan, spoon out most of excess fat and discard.

Step 4:
Break beef up with a wooden spoon and add Beef Starter & the chopped snow peas, and cook for another 3–4 minutes until the peas are just tender.

Step 5:

Zest and juice lime(s), keeping them separate. Then chop the cilantro. 

Step 6:
Make the sauce by first removing the beef & peas from pan. Then reduce the heat to medium.
Then to that same pan, still on the heat, add the lime juice & Thai Sauce Starter. Stir it to combine while scraping up any browned bits in the pan for 1-2 minutes. 

Step 7:
Add lime zest to rice and fluff with fork.  

Step 8:
Scoop rice onto a plate, top with crispy beef & snow peas mixtures,  and drizzle with the sauce.
Garnish with cilantro.

Single Skillet Spaghetti

4/8/2025

 
Picture
I do most of my TV viewing on the treadmill, so it took me a while to get to the part of my queue with Megan Markle's / Sussex's new Netflix series, even though I consider myself a Royalist.

In the first episode, she makes an "easy pasta dinner just like she does for her family." It's  a single-skillet spaghetti recipe. Unbeknownst to me, she says this is how Brits make their pasta (is this true, friends?), but I've also heard that this is an old Martha Stewart recipe.

Either way, the truth is that is that it's easy, especially after a long day of work  - so it passed that test as part of the Delaney Test Kitchen. 

​My boys are athletes and always need a bit more carbs, so I added the frozen baguettes from Trader Joe's, and they were the perfect complement to this meal. Enjoy!
Single Skillet Spaghetti

INGREDIENTS:
  • 2 pints of cherry tomatoes of mixed colors (yellow, red, etc..)
  • Kosher salt
  • Olive Oil
  • 4 Cloves garlic
  • 12 oz spaghetti
  • 1 lemon, zested
  • 1/2 bunch of kale, stems sliced,  and leaves roughly chopped
  •  1/2 bunch of kale or swiss chard, stems sliced and leaves roughly chopped 
  • 1 pint of baby arugula
  • 1/2 cup of grated Parmesan cheese

PREPARATION:
Step 1:
Fill and electric tea kettle, and boil 3 1/2 cups of water

Step 2:
In a large, deep skillet combine tomatoes, salt, olive oil, and garlic. Then place the dry spaghetti on top. Add the lemon zest, then the Swiss chard stems on top of the pasta.

Step 3:
Pour boiling water over the pasta. Cover pasta by 1 inch.

Step 4:
Cover with a lid, return to a boil and cook for 6-8 minutes.

Step 5:
Remove lid, and add the greens (chard and kale leaves, plus a handful of arugula). Cook 4-5 minutes more, until pasta is al dente.

Step 6:
​Drain, and top with a drizzle of olive oil and grated parmesan. Enjoy!


Cheeky Peri Peri Chicken

3/5/2022

 
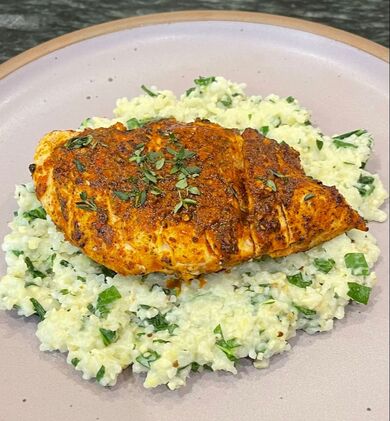
PicturePeri Peri Chicken with Grits
There is a chain of chicken restaurants that we discovered in the UK (and have since learned there are some in the US while on a visit to Washington, DC) called Nando's. They are famous for their Peri-Peri chicken, which comes in a variety of levels of spiciness.  Peri Peri means "strong pepper" in Swahili, so the heat is to be expected.  And we learned from friends that after a night out at the bars, Londoners will often go out for some "cheeky Nando's" to soak it all up.  Since we all love PeriPeri and Nando's in our house, I was excited when this was a big hit with my family.  We added it into our regular rotation, minus the grits and adding a little bit more spice. Instead of the grits, I often serve it with roasted fingerling potatoes.


Peri Peri Chicken,
with creamy grits, chili peppers & wilted collard greens (serves 4)

INGREDIENTS:
4 chicken breasts
Peri Peri Spice:  2 T sumac, 2 T smoked paprika
6 T thyme, 4 Thai chilies, 2 garlic clove
6 T red wine vinegar
 1 1/2 c grits
2 c milk
4 c collard greens
2/3 cup of Olive oil
​salt and pepper to taste

PREPARATION:
1. Preheat oven to 400°
2. Cook Grits:
  • Melt 3 Tbsp butter (6 Tbsp for meals serving 4) in a pot over med-high
  • Add grits and stir to toast for about 1 min
  • Add 1 ½ cups water (3 cups), milk & ½ tsp salt (1 tsp), bring to a boil, then reduce heat to med-low and cook 18–22 min, until thickened, stirring often

3. Make the Peri Peri Sauce
  • Pick thyme leaves from stem
  • Remove stem & seeds from chili peppers—HOT! - and add to taste
  • In a small food processor, pulse to combine garlic clove(s), most of thyme leaves—reserve about 2 tsp for garnish—chilies, Peri Peri Spice, red wine vinegar & 2/3 cup olive oil

4. Cook the Chicken
  • Pat chicken dry and then arrange on a sheet pan and season with salt, pepper & HALF of the peri peri sauce, turning to coat
  • Transfer to the oven and roast for 15–20 min, until chicken is cooked through

5. Prepare the Collards, and Finish the Grits
  • Remove stems and finely chop collard greens
  • Chop remaining thyme
  • When grits are done, stir in collard greens and season with salt and pepper to taste
6. Divide the grits evenly amongst the plates, top with chicken, and then drizzle with the remaining peri peri sauce. Garnish with chopped thyme leaves.


Cheesy Chicken Quesadillas

10/2/2021

 
Picture
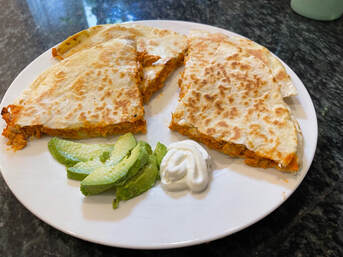
This is a recipe that my son has told me is the closest thing to authentic Mexican food he's tasted that I have ever made.  I also made this over the summer when we had 7 17y-olds to feed, and they ate.it.all.  Then the moms started asking me for the recipe.  So this is for them :-).

This recipe is easy to double for when the whole family is home or friends are over.  For those of you feeding teenage boys - just go ahead and double it.

​ 

Cheesy Chicken Quesadillas

INGREDIENTS:
8 oz  pulled chicken (cooked) (I get some at our local BBQ place and freeze it for this, or you can use a rotisserie chicken) 

Filling:
3 T cream cheese
6oz  tomato paste (small can)
2 tsp garlic / 4 tsp if
1 tsp cumin
1 tsp chili powder
 
3 T cilantro
4 ea 10” flour tortillas
1 ½ c shredded mozzarella
¼ c red onion
⅓ c sour cream
 

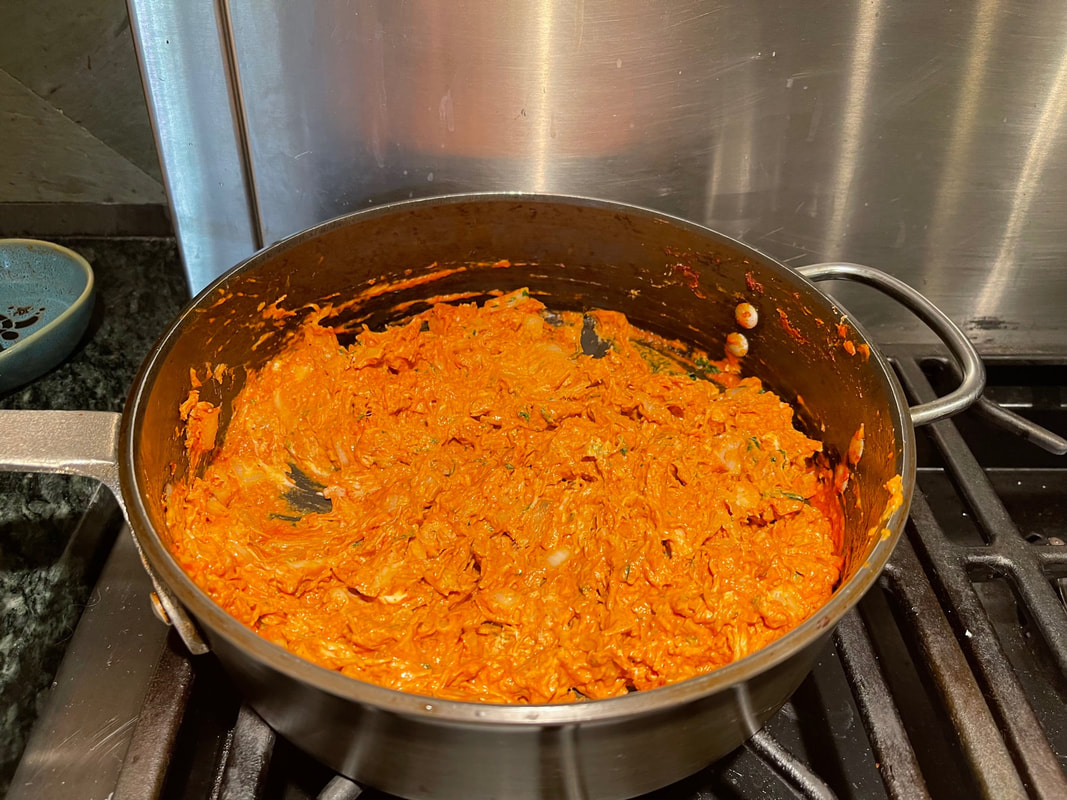
1. Prepare the Chicken: Defrost the chicken if necessary, and then roughly chop the pulled chicken.
 
Here you have two choices – you can get a rotisserie chicken and pull off the meat, get some pulled chicken from your favorite BBQ place, or I keep packages of it in the freezer to defrost as needed.


2. Start the Filling: Mix together all of the Filling ingredients into a medium sized bowl.
Chop the cilantro and add half to the mixture.
Then add in the roughly chopped chicken, and mix well.


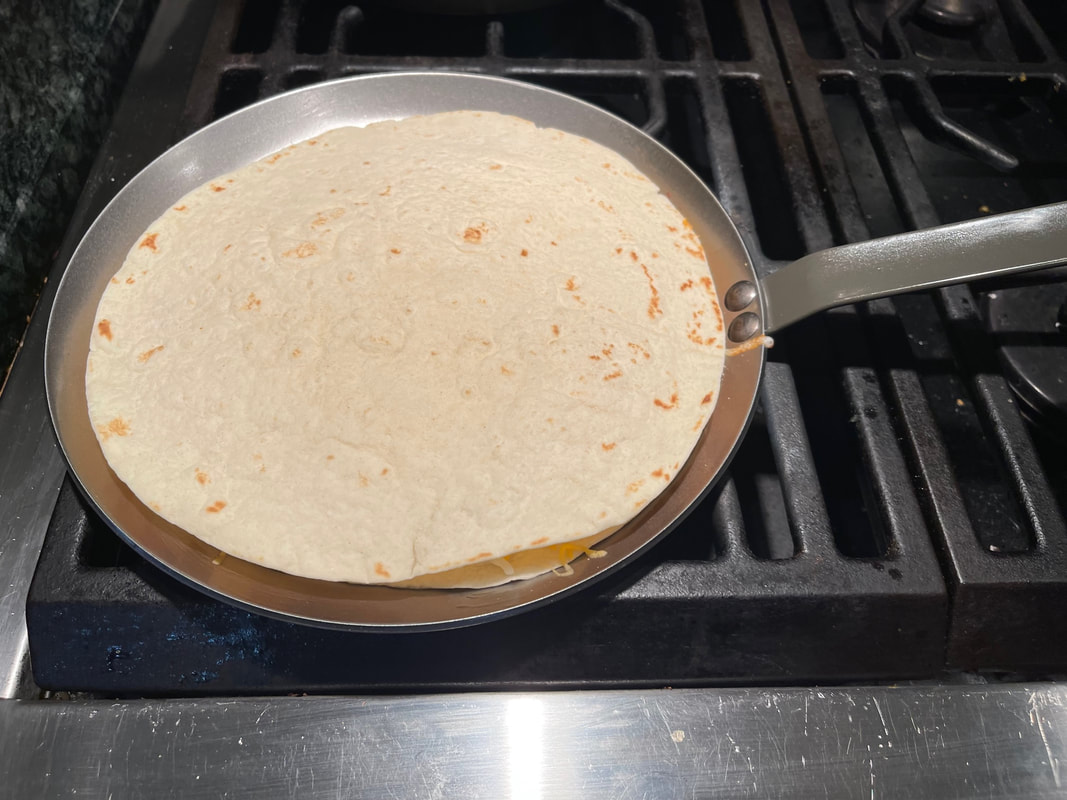
3. Cook the quesadillas: Heat one Tbsp of oil over medium heat.
Place one tortilla in the pan, cover with filling and mozzarella cheese to taste.
Then top with another tortilla.
 
You’ll want to cook them for 3-4 minutes per side, until the tortilla is golden & the cheese is melted.
 
Repeat the process to make additional quesadillas, adding more oil to the pan as necessary.

Place the quesadilla on a plate and cut into 4-6 wedges, using a pizza cutter.  

Serve with a dollop of sour cream an a sprinkle of some of the remaining cilantro, and some salsa.
Our favorite salsa is from Zocalo here in Atlanta

 
Enjoy!
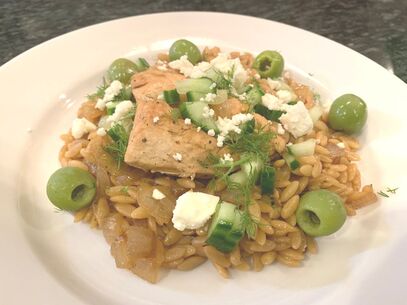
Skillet Chicken with Orzo, Dill and Feta

5/4/2021

 
Picture
The Delaney Test Kitchen was excited to try this recipe from @NYTCooking that included Feta, since   a) I am always looking for something interesting to cook in our cast iron pan (it feels more Southern than a regular saute pan), and b) after the success of TikTok Feta, I was eager to try another Feta recipe.
 ​
This one was more of a hit with the adults than the kids, but I really loved it since it included two of my favorite things – dill and olives. I think with one minor change it will work with everyone. The recipe calls for cooking the orzo in chicken broth or water.  I found it to be so much more flavorful with the broth, but not as appetizing to my little picky eater. So if you have one of those, you may want to just use water.
 
My favorite flavor in this dish was from the dill.  It was a nice change from what we normally expect from chicken and pasta, and it always pairs well with feta.
 
If you try this one, please let me know how it goes!

Skillet Chicken with Orzo, Dill and Feta

INGREDIENTS:
  • 2 lemons
  • 5 tablespoons olive oil
  • 3 garlic cloves, smashed
  • 1 teaspoon kosher salt
  • 1 teaspoon black pepper
  • 2 pounds chicken drumsticks or bone-in thighs
  • 1 yellow onion, peeled and chopped
  • 2 cups orzo
  • 3 cups chicken broth or water
  • 2 small or 1 large thin-skinned (English) cucumbers, chopped
  • 5 ounces feta, crumbled (about 1 1/4 cups)
  • 2 tablespoons chopped fresh dill
  •  Castelvetrano or other green olives, for serving
PREPARATION:
  1. Cut one of the lemons into wedges and set aside. Juice the remaining lemon and combine with 3 tablespoons olive oil, garlic, salt and pepper, in a large resealable plastic bag or in a bowl, along with the chicken pieces. Seal and shake the bag (or stir in the bowl) to coat. Set aside for 30 minutes, or refrigerate up to overnight.
  2. Heat the remaining 2 tablespoons olive oil in a large cast-iron skillet over medium-high heat. Remove the chicken from the marinade, letting the excess drip off, and cook until lightly golden all over, turning when the chicken releases easily from the pan, about 12 minutes total. Transfer chicken to a plate and set aside.
  3. Add the onion to the pan and stir to coat with the remaining fat. Decrease heat to medium and cook until soft, about 4 minutes. Stir in the orzo and the broth or water. Cook until the liquid is partly absorbed, stirring occasionally, about 5 minutes. Top with the chicken legs and cover with a lid or foil. Continue cooking until the orzo is tender, most of the liquid is absorbed, and the chicken is cooked through, 15 to 20 minutes more, depending on the size of your drumsticks or thighs. Remove from the heat and scatter the cucumber, feta and dill over the top. Serve from the skillet with lemon wedges and olives.
Tip:
  • Some cast-iron skillets come with a matching lid, which is useful for making the skillet operate a bit like a mini stove-top oven, cooking evenly and basting the food with flavor and steam. If you don’t have one, use a lid from another pan, or two layers of thick foil, folded at the center and large enough to cover your pan.

Picture
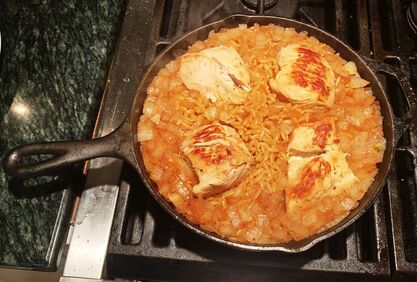
Chicken, Orzo and Onion in the pan before adding cucumber, feta, dill or olives.

    Author

    It doesn't matter how successful you are or how long your day is - there is only one question when you get home: what's for dinner? That is why I am always on the lookout for recipes that won't take more that 30 minutes to prepare, that are flavorful, and that (almost) everyone will eat. 

    Archives

    June 2026
    May 2026
    April 2026
    March 2026
    February 2026
    January 2026
    November 2025
    October 2025
    September 2025
    August 2025
    July 2025
    June 2025
    May 2025
    April 2025
    March 2025
    January 2025
    December 2024
    April 2024
    February 2024
    January 2024
    July 2023
    June 2023
    May 2023
    April 2023
    March 2023
    February 2023
    January 2023
    November 2022
    September 2022
    August 2022
    June 2022
    March 2022
    February 2022
    January 2022
    December 2021
    October 2021
    August 2021
    June 2021
    May 2021
    April 2021
    March 2021
    February 2021
    January 2021

    Categories

    All
    Air Fryer Recipe
    Appetizers
    Easy Dinners
    Lunch
    One Pot Dinner
    Pasta
    Sheet Pan Dinner
    Skillet Dinner
    Slow Cooker Dinner
    Trader Joe's Meals

Proudly powered by Weebly
  • Home
  • Busy Mom Dinners
  • Easy Lunches
  • Travel Itineraries
  • Travel Blog
  • FULLY BOOKED!
  • Breads & Baking
  • Veggies & Bevvies
  • Beige Food for My Boys
  • Links
  • Other "Dishes" (art, fashion, etc...)
  • About Me