 I found this recipe in the December/January issue of Allrecipes.com, and it looked liked it checked all the boxes for the Fam so I gave it a try in the Delaney Test Kitchen. And by that I mean it was only supposed to take 20 minutes total. What!? This one really was so easy, and the sauce was delish. The red pepper flakes at the end really give it the flavor it is missing otherwise, which is great because then everyone can regulate their desired level heat for themselves. We were still at the table when I was asked to add to to our regular rotation. For me, that is a win!
Bulgogi-Style Skillet Chicken Ingredients
1. For sauce: Whisk together white and light green parts of the green onion, soy sauce, brown sugar, garlic, sesame oil, sesame seeds, cayenne pepper, salt, and black pepper together in a bowl until marinade is smooth. 2. Cook and stir chicken and marinade together in a large skillet over medium-high heat until chicken is cooked through, about 15 minutes. 3. Divide rice and chicken evenly among four bowls and drizzle with sauce from the skillet. Garnish with reserved dark green onion. Serve with crushed red pepper. 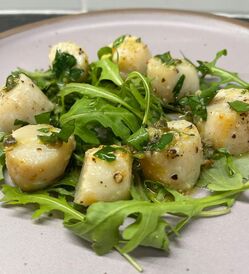 I am so tired of the Air-Fryer taking up room in my kitchen that I am committed to finding other purposed for it other than wings, fries and tater tots, and Brussels sprouts. This is the first recipe I tried that was a good alternative. I love scallops, but since no one else in my house does, I try to keep the portions small. This was also super quick, so I could easily replicate it for just me one one of those rare nights that I have to myself, or even for a wfh lunch. Air Fryer Scallops with Lemon-Herb Sauce
INGREDIENTS:
PREPARATION: 1. Sprinkle scallops with pepper and salt.2. Coat the basket of an air fryer with cooking spray. 3. Place scallops in the basket and coat them with cooking spray. 4. Place the basket in the fryer and cook at 400°F until they reach an internal temperature of 120°F, (about 6 minutes.) 5. Combine oil, parsley, capers, lemon zest and garlic in a small bowl. Drizzle over the scallops. 6. Serve with lemon wedges, if desired. 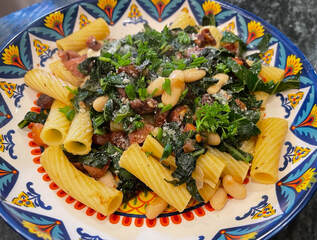 As a busy working mom, I am always on the lookout for yummy one-pot dinners. This one is actually two posts - one for boiling the pasta and one for everything else - but it was still easy. And this one was a bonus for the Delaney Test Kitchen since it has pasta in it – which is beige, and thus very popular in my house. This was a HUGE hit! And I even caught the boys actually eating the greens instead of picking them out. That is a solid win in my book. I’ve been asked to add this into our regular dinner rotation. And if you are worried about it being too spicy, it wasn't. It had just a light little kick that amped up the flavor. Pasta With Andouille Sausage, Beans and Greens INGREDIENTS: · Salt and black pepper · 1 pound rigatoni or any pasta with ridges · 2 tablespoons extra-virgin olive oil, plus more for drizzling · 12 ounces Andouille sausage, diced · 1 shallot, minced · 2 garlic cloves, minced · 1 bunch collard greens, stems discarded, leaves coarsely chopped (4 1/2 cups) · 1 tablespoon fresh thyme leaves · 1 (15-ounce) can cannellini beans, drained and rinsed · 1 cup diced fresh tomato (from 1 large) · ¼ cup chopped flat-leaf parsley · ¼ cup thinly sliced chives · 1 lemon, zested and cut into wedges, for serving · ¼ cup grated Parmesan, for serving PREPARATION: 1. Bring a large pot of salted water to a boil. Add pasta and cook until al dente according to the package’s instructions. 2. Meanwhile, heat oil in a large heavy-bottomed skillet over medium-high. Add sausage and cook, stirring occasionally, until browned, 5 to 7 minutes. Add shallot and garlic and cook, stirring often, until translucent, about 2 minutes. 3. Add collard greens and toss to wilt, 2 to 3 minutes. Season with salt and pepper. Add the thyme, cannellini beans and tomatoes and toss to warm through. Season again with salt and pepper to taste. 4. Reserve 1/2 cup pasta water and drain pasta. Return pasta to the empty pot and set over medium-low. Add the sausage mixture and toss to combine, gradually adding the reserved pasta water as needed to create a sauce. 5. Remove from the heat and sprinkle with parsley, chives, lemon zest and Parmesan. Season with salt and pepper to taste. Divide among bowls, drizzle with olive oil and serve with lemon wedges.  So.many.eggplants. And zucchinis. And my dill plant is seriously out of control. Oh my! This is an issue every summer, right? This recipe is awesome because it uses all of that, plus feta. This was easy and all in one pot (bonus). To be honest, the boys had no interest in these things mixed in with the pasta so we had a fabulous dinner with plenty of leftovers for lunch the next day for both of us. ) The boys just had plain pasta – their loss.) The recipe says you can use parsley or basil instead of the dill, but I loved the fragrance of the dill combined with the saltiness of the feta. And this makes an enormous amount of food, so it needs a seriously big big non-stick skillet. I got to use the pretty blue enamelware nonstick skillet from Bruntmore that I got for Mother’s Day last year. I will definitely be making this one again. Eggplant and Zucchini Pasta with Feta and Dill INGREDIENTS
PREPARATION 1. Heat 3 tablespoons oil in a large nonstick skillet over medium heat. Add eggplant, season with salt and pepper and cook, stirring occasionally, until golden and tender, about 10 minutes. Transfer to a bowl. 2. Add 2 tablespoons oil and zucchini to skillet and season with salt and pepper. Cook, stirring occasionally, until tender but not mushy, about 5 minutes. 3. While the vegetables cook, boil the pasta in a pot of salted water until al dente. Reserve 1 1/2 cups cooking water and drain pasta. Return pasta and reserved cooking water to pot over medium heat. Add remaining 1 tablespoon oil and 1 cup of cheese and cook, stirring, until the cheese melts and forms a sauce, about 2 minutes. Stir in zucchini, eggplant and dill; season with salt and pepper. 4. Serve pasta in bowls and top with remaining cheese. 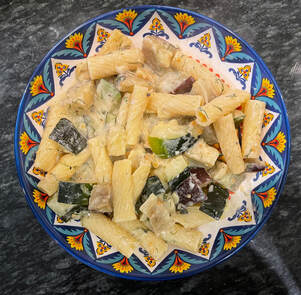 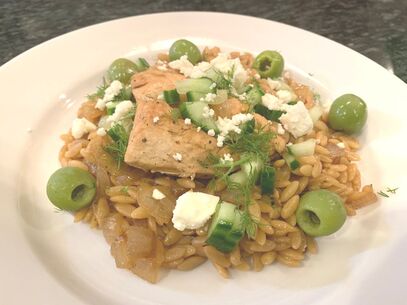 The Delaney Test Kitchen was excited to try this recipe from @NYTCooking that included Feta, since a) I am always looking for something interesting to cook in our cast iron pan (it feels more Southern than a regular saute pan), and b) after the success of TikTok Feta, I was eager to try another Feta recipe. This one was more of a hit with the adults than the kids, but I really loved it since it included two of my favorite things – dill and olives. I think with one minor change it will work with everyone. The recipe calls for cooking the orzo in chicken broth or water. I found it to be so much more flavorful with the broth, but not as appetizing to my little picky eater. So if you have one of those, you may want to just use water. My favorite flavor in this dish was from the dill. It was a nice change from what we normally expect from chicken and pasta, and it always pairs well with feta. If you try this one, please let me know how it goes! Skillet Chicken with Orzo, Dill and Feta INGREDIENTS:
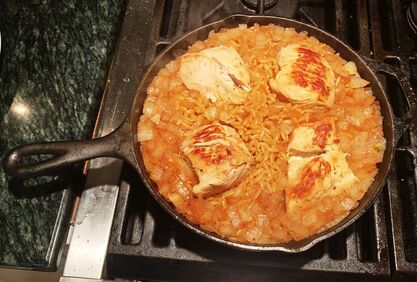 Chicken, Orzo and Onion in the pan before adding cucumber, feta, dill or olives. 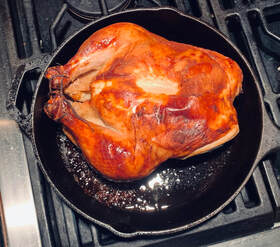 I am so tired of my standard chicken recipes, and I seem to have a lot of extra buttermilk around these days from all of my baking experiments. So I was excited to come across this recipe for Buttermilk-Brined Roast Chicken from NYT Cooking. This recipe is adapted from Samin Nosrat’s "Salt Fat Acid Heat" (which I loved) and is inspired by the Southern grandma method of marinating chicken overnight in buttermilk before frying it. This was an easy recipe to follow, and as promised the skin was nice and crispy and the chicken was juicy and perfect. The boys made it disappear. We’ll be adding this to the rotation. The only thing that makes this a little tricky is that you need to think about it the night before so that it has time to properly marinate. And since you have to take it out of the fridge an hour ahead of cooking, my recommendation is to cook this on a Friday or Saturday night when you may have just a little bit more time. Beyond that, enjoy! And let me know how yours turns out! Buttermilk-Brined Roast Chicken, by Samin Nosrat
INGREDIENTS:
PREPARATION:
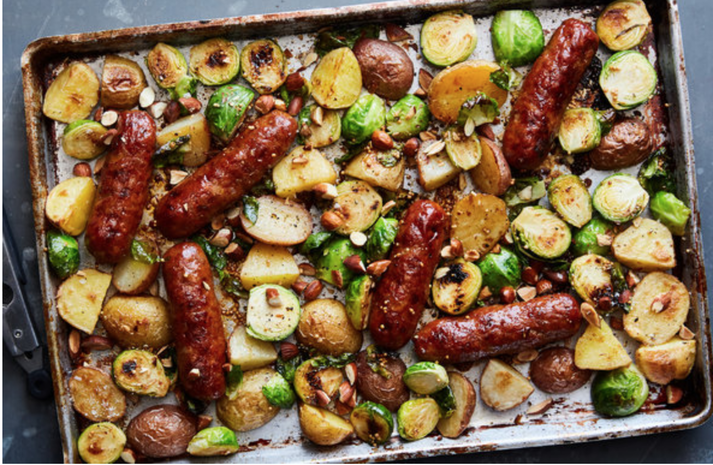 For the second test kitchen trial of the NYT’s special sheet-pan dinner section from February 2021, we tried the Sheet-Pan Sausages and Brussels Sprouts with Honey Mustard. And it was a huge win. I did not vary from the recipe as is except that I chose not use add the options yellow mustard seeds or chopped nuts. But I did use hot Italian Sausage, and that gave it a nice kick along with the mustard flavor. I think without that it may have been a little too bland. I served them with mashed potatoes to make sure my little athletes also got the carbs that they need. I encourage you to add it to your busy weeknight meal rotation, too! Here’s the recipe as I used it: Sheet-pan Sausages and Brussels Sprouts with Honey Mustard INGREDIENTS: · 1 pound fresh sausage, such as sweet or hot Italian, or bratwurst · 1 pound brussels sprouts, trimmed and halved lengthwise · 1 pound small potatoes, like baby Yukon gold or red potatoes, halved · 2 tablespoons extra-virgin olive oil, plus more as needed · Kosher salt and black pepper · 4 teaspoons honey · 1 tablespoon Dijon mustard PREPARATION: 1. Heat oven to 450 degrees, and place a sheet pan in the oven. Score the sausages in a few places on both sides, making sure not to cut all the way through. Transfer to a large bowl with the brussels sprouts, potatoes and 2 tablespoons olive oil, and stir until coated. (If the mixture seems dry, add a little more oil.) Season with salt and pepper. 2. Spread the mixture in an even layer on the heated baking sheet, and arrange the vegetables cut-sides down. Roast 15 minutes, until the brussels sprouts and potatoes start to soften. (The sausages will not be cooked through yet.) 3. Meanwhile, in a small bowl, stir together the honey, and mustard. 4. Drizzle the honey mustard over the sausages and vegetables, and toss or shake to coat. Flip the sausages. Roast until the sausages are cooked through and the vegetables are golden and tender, another 10 minutes or so. Season to taste with salt and pepper. 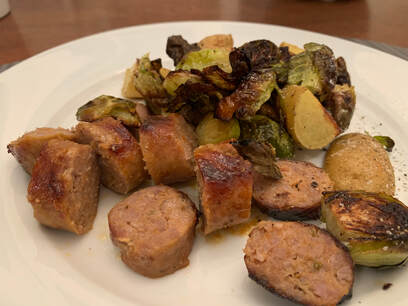 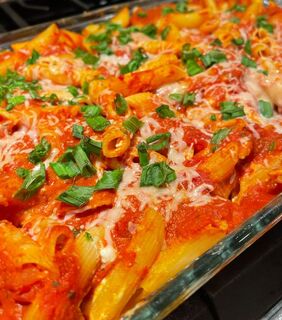 Easy Low Fat Baked Ziti This is an easy, yummy recipe that evolved over time. Plus its only one dish, which makes cleanup easy.
Ingredients: 16oz box of ziti, penne, or rigatoni One onion One green pepper 8oz of cottage cheese 8oz neufchatel cream cheese 32oz jar of your favorite pasta sauce (we prefer Michaels of Brooklyn’s Home Style Gravy) 4oz of low fat shredded mozzarella (1/2 a package) Pam or olive oil cooking spray And for this recipe, I use a 3Qt. pyrex glass rectangular baking dish Step 1: Bring a large pot of water to a boil. Add the pasta and cook as per the box instructions (usually around 11 minutes). Step 2: Place the Neufchatel cheese (still in the wrapper) near the pasta pot to help soften it to make it easier for mixing later. Step 3: Slice a medium sized onion into chunks. Step 4: Remove the seeds from the green pepper and cut in to small chunks. Step 5: Lightly spray the inside of the baking dish with Pam. Step 6: When the pasta is done cooking, drain it and then add to the pyrex dish. Step 5: Mix the pasta with the peppers and onions. Step 6: Mix in the cottage cheese, and remove the wrapper from the Neufchatel cheese to add it as well. Step 7: Once thoroughly mixed, pour the pasta sauce over the top. Mix it to make sure it is evenly distributed throughout the dish. Step 8: Sprinkle the top with the shredded low-fat mozzarella cheese. Step 9: Cover with foil and bake at 350F for 30 minutes. Remove the foil for the last 10 minutes. |
AuthorKris Delaney is a marketing executive, foodie, travel enthusiast, and book nerd based in Atlanta, GA. Archives
July 2023
Categories
All
|
 RSS Feed