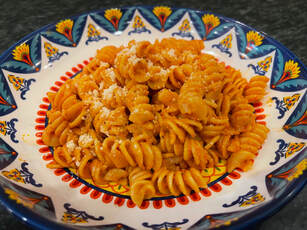
 So there are a few recipes circulating around on Tiki Tok and social, and I've tried a few of them with mixed results. But this one looked easy and the reviews were all solid so I tried it in the Delaney Test Kitchen. And my family LOVED it. They even asked that it be added into the regular rotation. Its definitely worth a try - I hope you love it, too. And thanks for sharing, Gigi!
Gigi Hadid's Spicy Vodka Pasta Sauce INGREDIENTS: ¼ c olive oil 1 clove garlic 1 shallot 1T fresh Basil 1 small can of tomato paste 1T vodka ½ c heavy cream ½ c grated parmesan separated (1/4 for recipe and ¼ for topping) 1 t Chili flakes (I recommend closer to 1 T) 1T butter 16 oz pasta (I recommend Rotini) Salt & pepper to taste PREPARATION: 1. Dice the garlic and shallot. 2. Heat ¼ c of olive oil in a large saucepan, add the shallot and garlic, and cook until soft (2-3 mi nutes). 3. Add the tomato paste and cook until the sauce is a bit darker and carmelized 4. Add 1 tablespoon vodka and cook until it almost evaporates. (You can also skip the vodka altogether if you prefer.) 5. Add 1/2 cup heavy cream and chili flakes (1t, or more if you like it hotter). Keep stirring until the sauce is combined. Season with salt & pepper to taste. Remove the sauce form the heat. 6. Cook the pasta according to directions on the box. Before draining it, save 1/4 cup or more of the pasta water. 7. Add the cooked (& drained) pasta, the 1/4 cup reserved pasta water, and 1 tablespoon butter to the red sauce in the large saucepan. Stir over medium heat till the butter has melted and the sauce looks done. (note: if your sauce is too thick or simply not saucy enough, slowly add the additional pasta water you put aside earlier until it reaches your desired consistency.) 8. Add ¼ c Parmesan Cheese and stir. 9: Serve Topped with Parmesan Cheese and Chopped Basil. 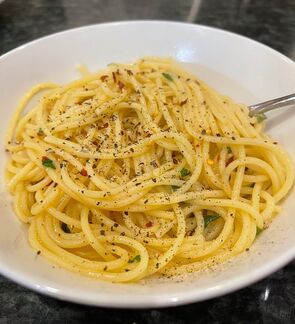 I love that the story behind this recipe is that its pasta you can easily make in the middle of the night with just a few pantry staples. With a teenaged boy in the house, he makes a fifth meal every night at 11:30pm or 12am. This is another option for him, and for the family.
This recipe from New York Times Cooking does seem a little bit more complicated since it requires roasting the garlic ahead of time. For me, I put the garlic in the oven while I worked out, and then made dinner an hour later and it was perfect. You can always make a lot of roasted garlic at once and save it for up to 2 weeks in the fridge or 2 months in the freezer. Then it truly can be a Midnight Pasta. For the record – this was also a hit. I served some non-chile pasta to my 11 year old, but the rest of us enjoyed the spicy recipe as is. Yum! Midnight Pasta with Roasted Garlic, Olive Oil and Chile INGREDIENTS: · 1 large head of garlic · Kosher salt · ½ cup plus 1 teaspoon extra-virgin olive oil · 1 cup firmly packed parsley leaves · 1 pound spaghetti or other long pasta · ½ teaspoon red-pepper flakes, plus more for garnish · Black pepper · Freshly grated Parmesan, for serving PREPARATION: Step 1:
Step 2:
Step 3:
Step 4:
Step 5:
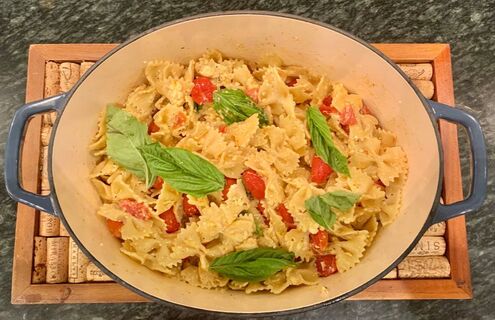
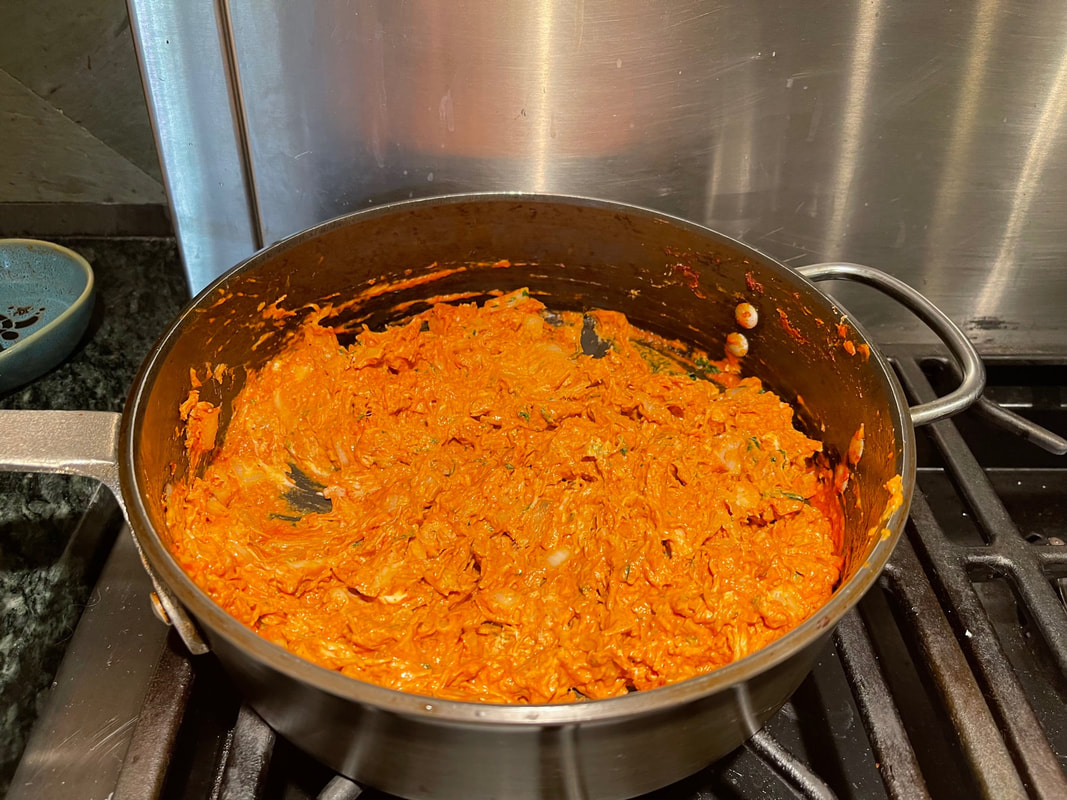
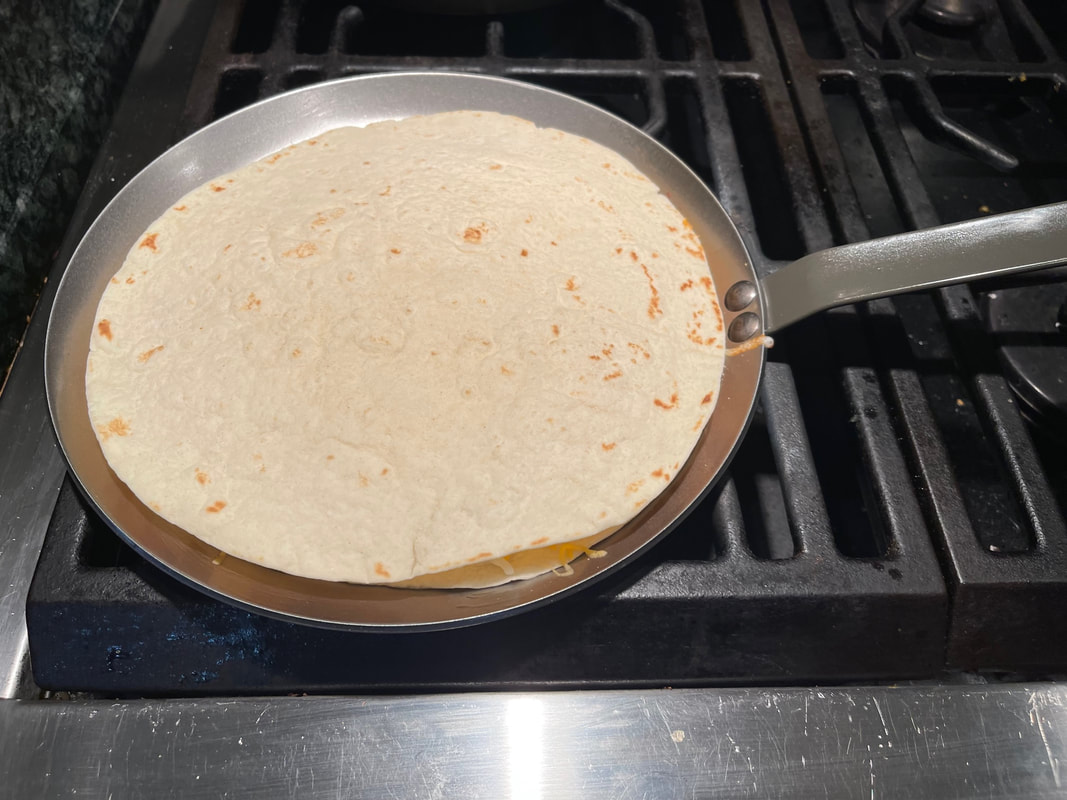
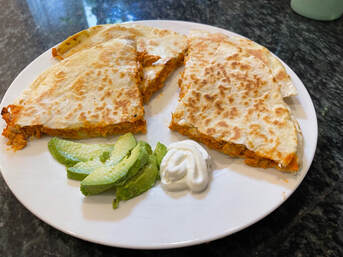 This is a recipe that my son has told me is the closest thing to authentic Mexican food he's tasted that I have ever made. I also made this over the summer when we had 7 17y-olds to feed, and they ate.it.all. Then the moms started asking me for the recipe. So this is for them :-). This recipe is easy to double for when the whole family is home or friends are over. For those of you feeding teenage boys - just go ahead and double it. Cheesy Chicken Quesadillas INGREDIENTS: 8 oz pulled chicken (cooked) (I get some at our local BBQ place and freeze it for this, or you can use a rotisserie chicken) Filling: 3 T cream cheese 6oz tomato paste (small can) 2 tsp garlic / 4 tsp if 1 tsp cumin 1 tsp chili powder 3 T cilantro 4 ea 10” flour tortillas 1 ½ c shredded mozzarella ¼ c red onion ⅓ c sour cream 1. Prepare the Chicken: Defrost the chicken if necessary, and then roughly chop the pulled chicken. Here you have two choices – you can get a rotisserie chicken and pull off the meat, get some pulled chicken from your favorite BBQ place, or I keep packages of it in the freezer to defrost as needed. 2. Start the Filling: Mix together all of the Filling ingredients into a medium sized bowl. Chop the cilantro and add half to the mixture. Then add in the roughly chopped chicken, and mix well. 3. Cook the quesadillas: Heat one Tbsp of oil over medium heat. Place one tortilla in the pan, cover with filling and mozzarella cheese to taste. Then top with another tortilla. You’ll want to cook them for 3-4 minutes per side, until the tortilla is golden & the cheese is melted. Repeat the process to make additional quesadillas, adding more oil to the pan as necessary. Place the quesadilla on a plate and cut into 4-6 wedges, using a pizza cutter. Serve with a dollop of sour cream an a sprinkle of some of the remaining cilantro, and some salsa. Our favorite salsa is from Zocalo here in Atlanta Enjoy!  So.many.eggplants. And zucchinis. And my dill plant is seriously out of control. Oh my! This is an issue every summer, right? This recipe is awesome because it uses all of that, plus feta. This was easy and all in one pot (bonus). To be honest, the boys had no interest in these things mixed in with the pasta so we had a fabulous dinner with plenty of leftovers for lunch the next day for both of us. ) The boys just had plain pasta – their loss.) The recipe says you can use parsley or basil instead of the dill, but I loved the fragrance of the dill combined with the saltiness of the feta. And this makes an enormous amount of food, so it needs a seriously big big non-stick skillet. I got to use the pretty blue enamelware nonstick skillet from Bruntmore that I got for Mother’s Day last year. I will definitely be making this one again. Eggplant and Zucchini Pasta with Feta and Dill INGREDIENTS
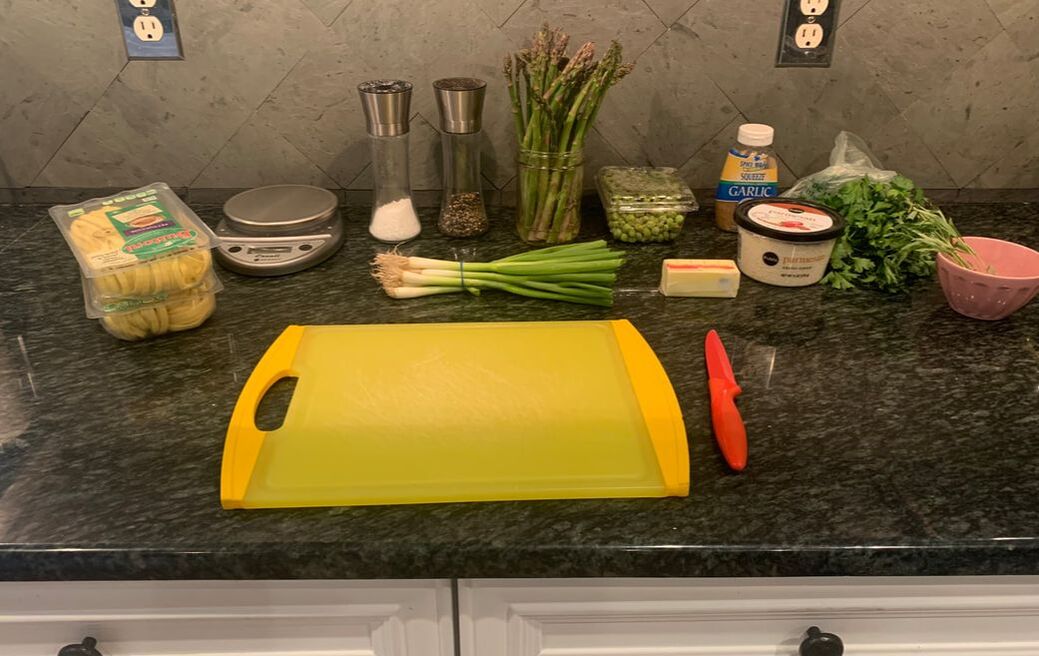
PREPARATION 1. Heat 3 tablespoons oil in a large nonstick skillet over medium heat. Add eggplant, season with salt and pepper and cook, stirring occasionally, until golden and tender, about 10 minutes. Transfer to a bowl. 2. Add 2 tablespoons oil and zucchini to skillet and season with salt and pepper. Cook, stirring occasionally, until tender but not mushy, about 5 minutes. 3. While the vegetables cook, boil the pasta in a pot of salted water until al dente. Reserve 1 1/2 cups cooking water and drain pasta. Return pasta and reserved cooking water to pot over medium heat. Add remaining 1 tablespoon oil and 1 cup of cheese and cook, stirring, until the cheese melts and forms a sauce, about 2 minutes. Stir in zucchini, eggplant and dill; season with salt and pepper. 4. Serve pasta in bowls and top with remaining cheese. 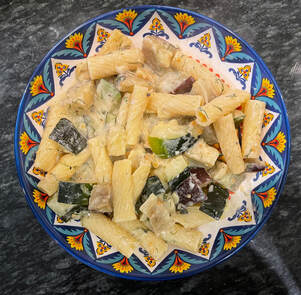  I am sure we’ve all seen that meme about owning an air fryer. So I’ve decided to test some air fryer recipes for you. I will tell you that tater tots never tasted as good as they do coming from the air fryer. Wings are pretty solid, as are chicken nuggets. And roasted brussels come out perfectly. But those four dishes don’t warrant the amount of real estate this thing is taking up on my counter. So I have started on a quest to see what else it can do. The first recipe I tried was from “The Complete Air Fryer Cookbook” by Linda Larson. As you can see from the photo, I’ve flagged a number of recipes to try from this cookbook. 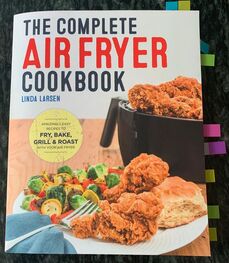 But for this first one, I tried the Lemon Pork Tenderloin. We like pork in our house, but I am tired of always making it in was is essentially the same way. This recipe resulted in perfectly cooked, juicy pork chops. In fact, I also cooked the brussels sprouts for this dinner in the air fryer as well. I cooked the sprouts first, then kept them covered and warm while I washed out the basket and then cooked the pork. Adding some quick mashed potatoes to it made it a winner for me as far as busy mom meals, go. This recipe called for creating a marinade with olive oil, lemon juice, honey, lemon zest, marjoram=m, and salt and pepper, and letting the pork chops marinate in that. I let them marinate for 15 minutes, then cooked them in the air fryer, which only took about 10 minutes. Voila! So yes – I would recommend this one as another easy Air Fryer recipe(s) for a busy weeknight meal.  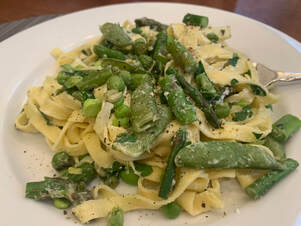 I love asparagus, but I am so tired of just steaming it. I was looking for another option when I found this recipe for Pasta Primavera with Asparagus and Peas from the New York Times Cooking. So I decided to give it a try in the Delaney Test Kitchen. You’ll see that the recipe calls for crème fraiche or whole milk Greek yogurt. I went the yogurt route to be a little more healthy, but I could see how the crème fraiche would have added more flavor. I also felt that there wasn't enough sauce, so I used 1/4 cup of the pasta water when I mixed it all together and that worked great. I also used Buitoni Fettuce from the supermarket instead of making my own pasta for this one, since I needed it as a quick mid-week meal and I didn’t have any more fresh pasta on hand. Two packages was too much – I’d recommend using a 1 ½ packages instead. I love veggies in my pasta, so this was a win for me. My kids, not so much. But I will try again since it was so easy. Try for yourself and let me know what you think! Pasta Primavera with Asparagus and Peas: INGREDIENTS:
PREPARATION:
 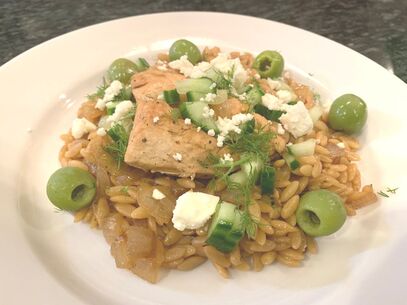 The Delaney Test Kitchen was excited to try this recipe from @NYTCooking that included Feta, since a) I am always looking for something interesting to cook in our cast iron pan (it feels more Southern than a regular saute pan), and b) after the success of TikTok Feta, I was eager to try another Feta recipe. This one was more of a hit with the adults than the kids, but I really loved it since it included two of my favorite things – dill and olives. I think with one minor change it will work with everyone. The recipe calls for cooking the orzo in chicken broth or water. I found it to be so much more flavorful with the broth, but not as appetizing to my little picky eater. So if you have one of those, you may want to just use water. My favorite flavor in this dish was from the dill. It was a nice change from what we normally expect from chicken and pasta, and it always pairs well with feta. If you try this one, please let me know how it goes! Skillet Chicken with Orzo, Dill and Feta INGREDIENTS:
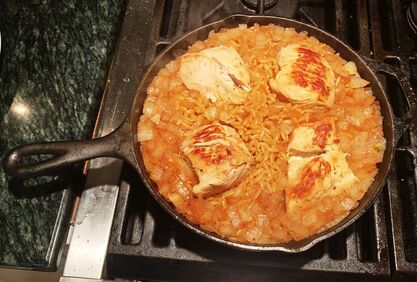 Chicken, Orzo and Onion in the pan before adding cucumber, feta, dill or olives. 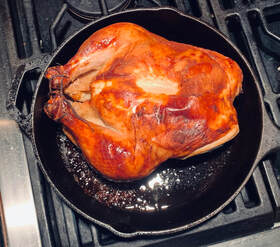 I am so tired of my standard chicken recipes, and I seem to have a lot of extra buttermilk around these days from all of my baking experiments. So I was excited to come across this recipe for Buttermilk-Brined Roast Chicken from NYT Cooking. This recipe is adapted from Samin Nosrat’s "Salt Fat Acid Heat" (which I loved) and is inspired by the Southern grandma method of marinating chicken overnight in buttermilk before frying it. This was an easy recipe to follow, and as promised the skin was nice and crispy and the chicken was juicy and perfect. The boys made it disappear. We’ll be adding this to the rotation. The only thing that makes this a little tricky is that you need to think about it the night before so that it has time to properly marinate. And since you have to take it out of the fridge an hour ahead of cooking, my recommendation is to cook this on a Friday or Saturday night when you may have just a little bit more time. Beyond that, enjoy! And let me know how yours turns out! Buttermilk-Brined Roast Chicken, by Samin Nosrat
INGREDIENTS:
PREPARATION:
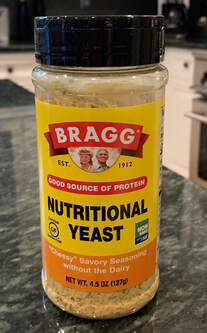
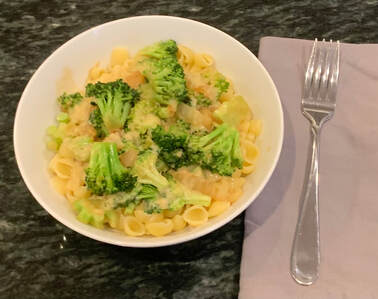 Have you heard of nutritional yeast? I had not. So when I found this yummy-sounding recipe for Creamy Vegan Pasta, I was surprised as I tried to line up all the ingredients and found Nutritional Yeast on the list. How had I not heard of this before? It has 5g of protein per serving, and is packed with B vitamins, and is an excellent source of Thiamin, Riboflavin, Niacin, Folic Acid and Vitamins B6 and B12. It is used as an additive to add a savory cheese-like flavor to vegan recipes. I found it next to the regular yeast in the supermarket aisle. This recipe is from one of my favorite blogs, Love and Lemons. I could not get my kids to eat it, but I thought it was as yummy as I expected. So this is a Working Mom Dinner but for my house – it’s only really for you and maybe one other possible diner. Plus I found that the sauce was really only enough for two servings. (Perhaps I was heavy handed since it was yummy.) Another option is to save the second serving for an easy lunch the next day. If you live in Atlanta and have been to Mirko Pasta, this sauce reminds me of that fabulous white bean dip they serve with your fresh Italian bread. Yum. On the Love and Lemons website, they also recommend experimenting with this dish. Some of their suggestions include:
If you try this one, please let me know how it turns out. And let me know if your kids like it, too. Creamy Vegan Pasta (serves 4) Ingredients:
  Like everything else during the pandemic, I am late to the baked feta and pasta trend and controversy. So I had to see was it was all about. I found the original recipe and gave it a try. Suffice it to say that there were no leftovers. It was a hit, it was easy, and it was really yummy. The salty baked feta, the sweet cherry tomatoes, the fresh garlic and basil all made the house smell fantastic. I don’t have any edits or suggestions to add to the recipe, other than I increased the garlic a little bit and thought it was perfect, and they are right that it works best in a smaller baking dish so that all of the flavors can co-mingle. And adding the pinch of red pepper flakes once it is done cooking gave it just a enough of a kick. Give it a try and let me know what you think! Baked Feta Pasta – Tiktok Original Ingredients:
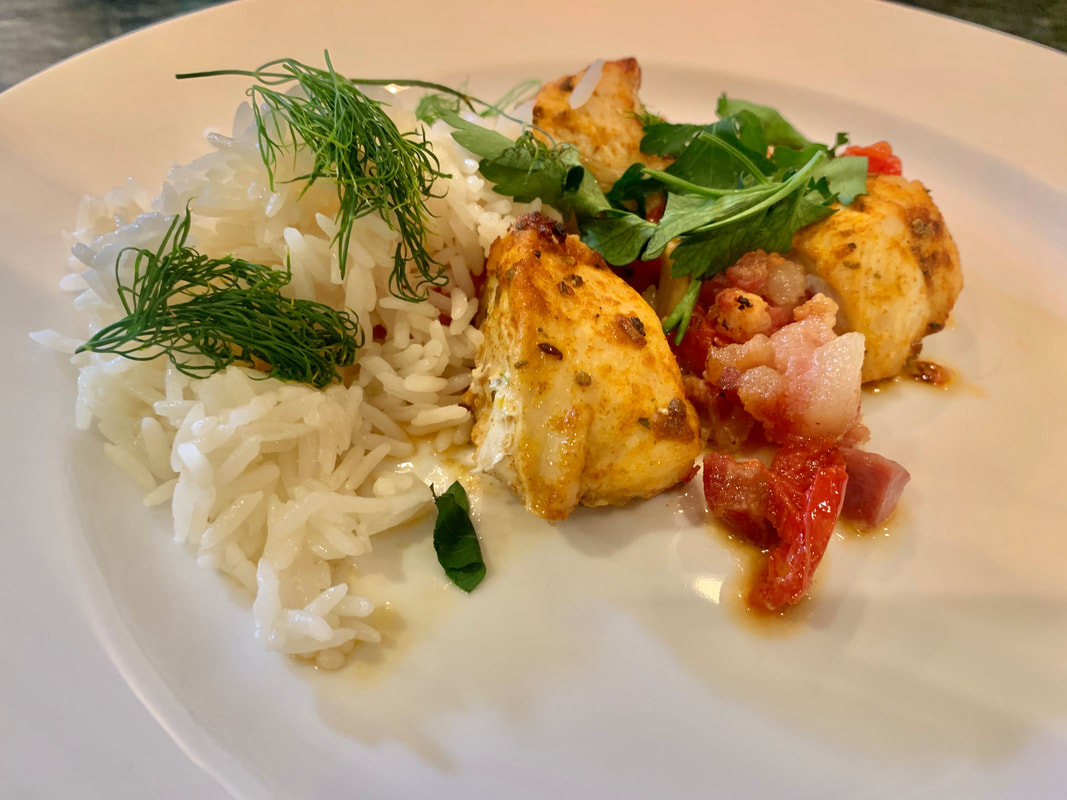
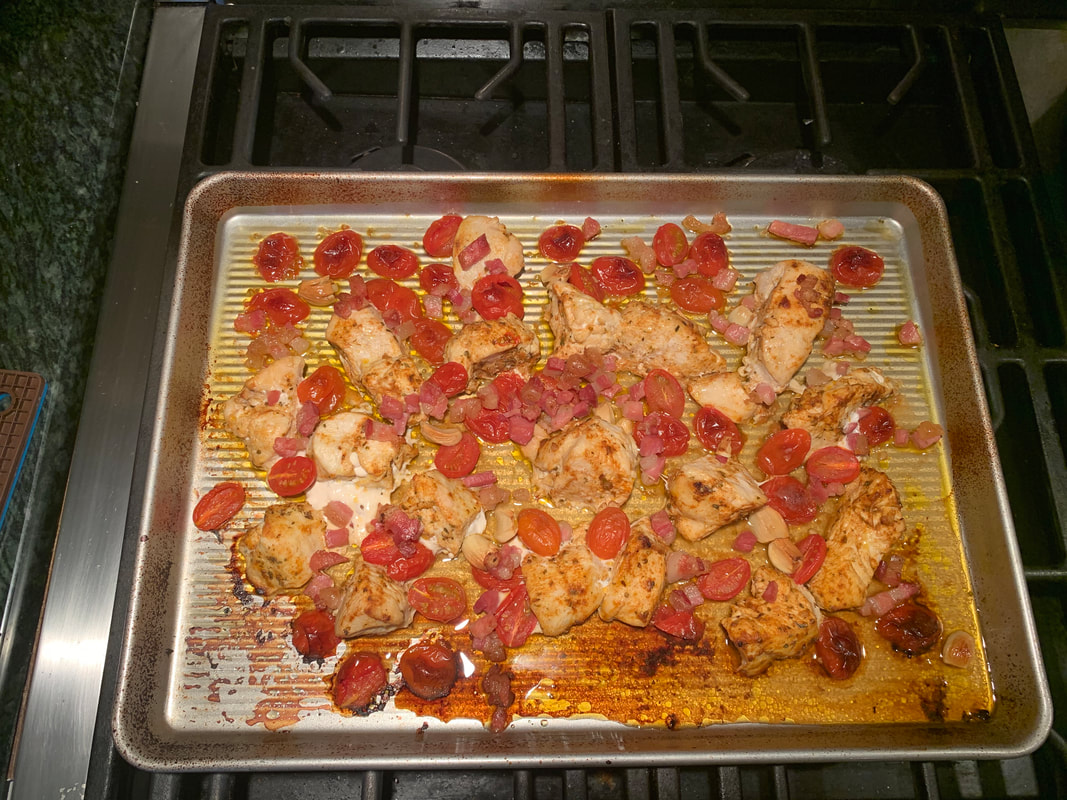
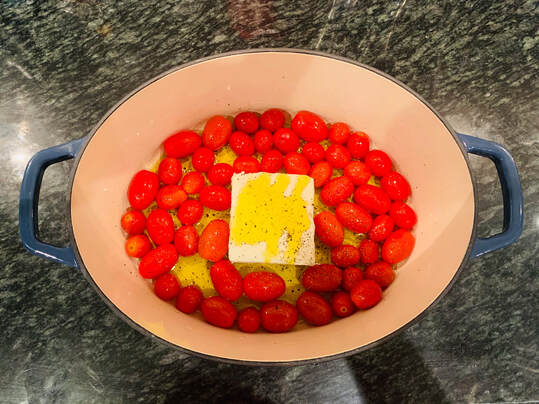 TikTok Feta Pasta - Before Cooking 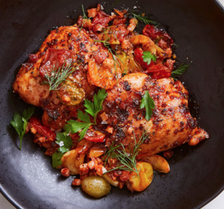 For the next edition of the Delaney Test Kitchen re-creation of the NYT special section on sheet-pan dinners I made the Sheet-Pan Chicken with Jammy Tomatoes and Pancetta. My kids said they even liked this one even more than the Gochujang Chicken and Roasted Vegetables. That is saying a lot. As with all sheet-pan meals, this was super easy. But I did stray from the original recipe a bit to make sure my crew would eat it. Here are the changes I made: 1. Instead of chicken thighs, I used chicken breasts. But I did not reduce the cooking time. 2. Instead of 2oz of pancetta, I used 4oz. The package was 4oz, and I didn’t have anything else to use it with, so I threw it in. And I am so glad I did – I think this was a big reason why the tray was devoured. 3. For the fresh spices at the end, I used both dill and parsley. 4. I used way more garlic - maybe another Tbsp of freshly grated in the marinade. Yum. 4. I served this with a side of Jasmine Rice. One other change I made - for my guys I I had to rebrand it as Sheet-pan Garlic Roasted Chicken with Tomatoes. It was much more appetizing to them. With the original name they were like, "what is it??" Here is the recipe for Sheet-Pan Garlic Roasted Chicken with Tomatoes, aka: Sheet-Pan Chicken with Jammy Tomatoes and Pancetta Ingredients: · 1 ½ pounds boneless, skinless chicken thighs · ½ teaspoon kosher salt, plus more as needed · 9 whole unpeeled garlic cloves · 2 tablespoons extra-virgin olive oil, plus more for drizzling · 1 ½ tablespoons fresh lemon juice, plus more for serving · 1 tablespoon sweet or smoked paprika · 1 teaspoon dried oregano · 1 teaspoon brown sugar (optional) · ¾ teaspoon ground cumin · 1 pint cherry tomatoes (preferably different colors), halved · 2 ounces diced pancetta or bacon · ¼ cup torn fresh dill, parsley or other herbs, for serving · Freshly ground black pepper Preparation: Step 1: Heat oven to 425 degrees. Season chicken all over with salt, and place on a rimmed baking sheet. Step 2: Smash all the garlic cloves with the side of a knife and peel them. Finely grate one garlic clove and put it in a small bowl. Stir in the 2 tablespoons olive oil, 1 1/2 tablespoons lemon juice, paprika, oregano, brown sugar (if using) and cumin. Pour over chicken, tossing to coat. Step 3: Add tomatoes and remaining smashed, peeled garlic cloves to baking sheet, spreading them out around the chicken. Season tomatoes lightly with salt and drizzle with a little more olive oil. Scatter pancetta on top. Step 4: Roast until chicken is golden and cooked through, about 30 to 35 minutes. After 15 minutes, stir the tomatoes and pancetta, but don’t disturb the chicken. Step 5: Transfer chicken to plates. Stir the tomatoes and pancetta around in the pan, scraping up all the delicious browned bits from the bottom and sides, and stir in the herbs and black pepper to taste. Taste and add salt, if needed, and a squeeze of fresh lemon juice, if you like. Spoon tomatoes, garlic and pancetta over the chicken to serve. 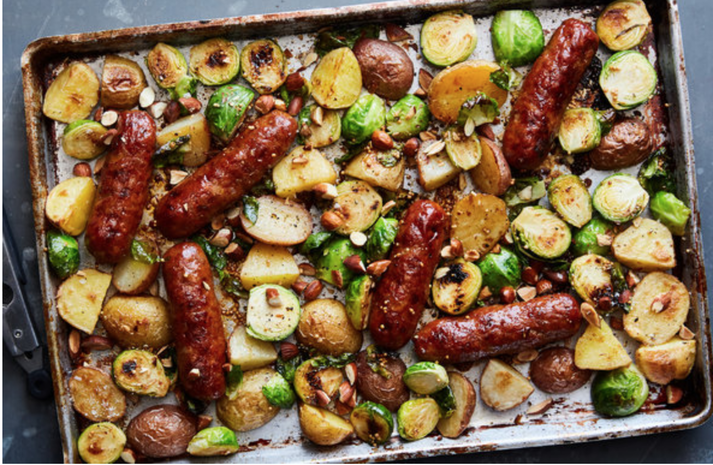 For the second test kitchen trial of the NYT’s special sheet-pan dinner section from February 2021, we tried the Sheet-Pan Sausages and Brussels Sprouts with Honey Mustard. And it was a huge win. I did not vary from the recipe as is except that I chose not use add the options yellow mustard seeds or chopped nuts. But I did use hot Italian Sausage, and that gave it a nice kick along with the mustard flavor. I think without that it may have been a little too bland. I served them with mashed potatoes to make sure my little athletes also got the carbs that they need. I encourage you to add it to your busy weeknight meal rotation, too! Here’s the recipe as I used it: Sheet-pan Sausages and Brussels Sprouts with Honey Mustard INGREDIENTS: · 1 pound fresh sausage, such as sweet or hot Italian, or bratwurst · 1 pound brussels sprouts, trimmed and halved lengthwise · 1 pound small potatoes, like baby Yukon gold or red potatoes, halved · 2 tablespoons extra-virgin olive oil, plus more as needed · Kosher salt and black pepper · 4 teaspoons honey · 1 tablespoon Dijon mustard PREPARATION: 1. Heat oven to 450 degrees, and place a sheet pan in the oven. Score the sausages in a few places on both sides, making sure not to cut all the way through. Transfer to a large bowl with the brussels sprouts, potatoes and 2 tablespoons olive oil, and stir until coated. (If the mixture seems dry, add a little more oil.) Season with salt and pepper. 2. Spread the mixture in an even layer on the heated baking sheet, and arrange the vegetables cut-sides down. Roast 15 minutes, until the brussels sprouts and potatoes start to soften. (The sausages will not be cooked through yet.) 3. Meanwhile, in a small bowl, stir together the honey, and mustard. 4. Drizzle the honey mustard over the sausages and vegetables, and toss or shake to coat. Flip the sausages. Roast until the sausages are cooked through and the vegetables are golden and tender, another 10 minutes or so. Season to taste with salt and pepper. 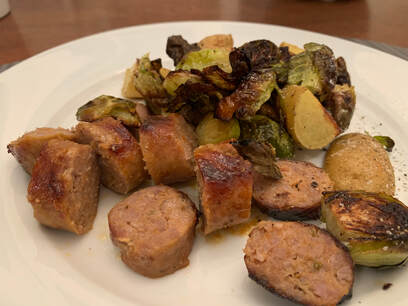 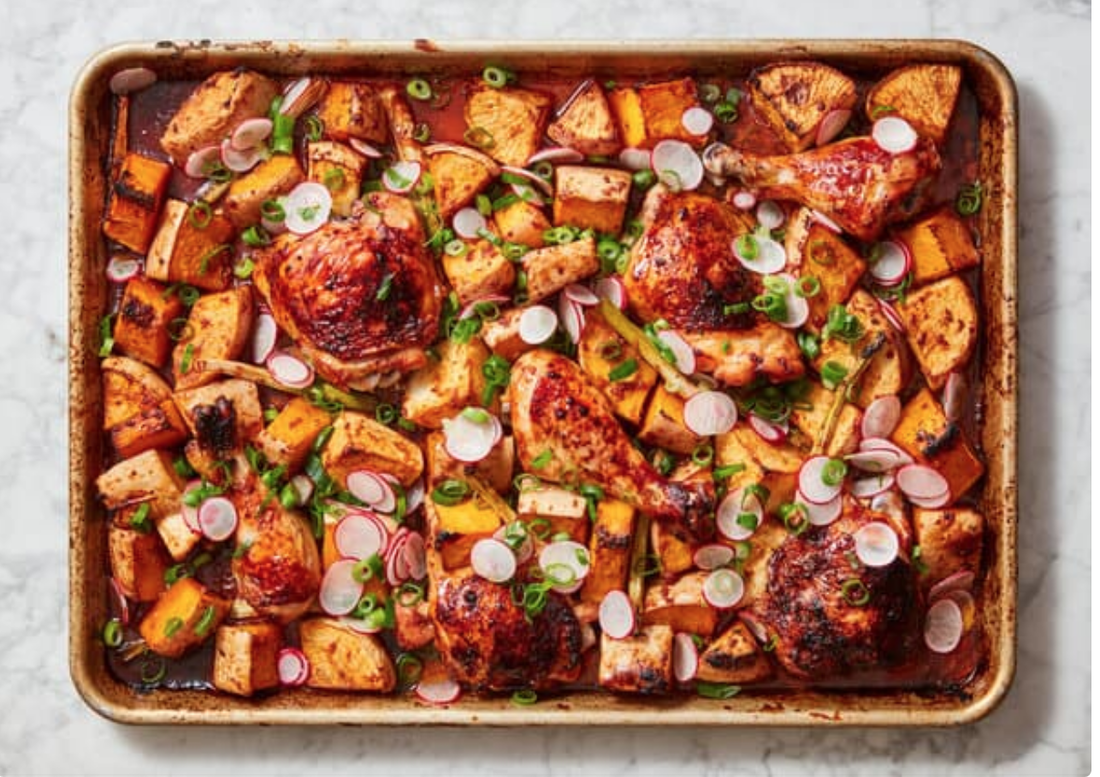 As a working mom with kids who play multiple sports, the evenings are really tight on time to make a good, nutritious dinner. Especially one that some picky eaters will eat. The best solution? Sheet-Pan Dinners. I have a couple of them that are my go-to meals, like the Lemon Chicken Sheet-Pan Dinner that I posted earlier. But the New York Times Cooking did an entire special section called “Sheet Pan Everything” on 2/28/21 and I am obsessed. The Delaney Test Kitchen has started trying them out for you. I’m not going to make all of the recipes in the section because I know my boys won’t at all of it, but there are some serious contenders to add to the regular rotation. The first one we tried was Sheet-Pan Gochujang Chicken and Roasted Vegetables. I knew my guys would love this, because they love everything I make with Gochujang. And I think they may have accidentally enjoyed the roasted acorn squash too. Here’s the recipe: Sheet-Pan Gochujang Chicken and Roasted Vegetables Makes 4-6 servings INGREDIENTS: · 3 tablespoons gochujang · 2 tablespoons soy sauce · 1 (1-inch) piece fresh ginger, peeled and grated (about 1 tablespoon) · 3 tablespoons neutral oil, like grapeseed or canola, plus more for drizzling · 2 pounds squash, such as butternut, acorn or delicata, unpeeled, seeded and cut into... · 1 pound turnips, trimmed and cut into 2-inch pieces (about 3 1/2 loose cups) · 10 scallions, ends trimmed, green and white parts separated, but not chopped · Kosher salt · 2 1/2 to 3 pounds bone-in, skin-on chicken thighs, drumsticks or breasts, patted dry · 1 bunch radishes (about 10 ounces), trimmed · 2 tablespoons rice vinegar · 1 tablespoon sesame oil (optional) · Steamed rice (optional) TIP: Instead of squash, you can use the same amount of other root vegetables like carrots, potatoes and beets, or lighter vegetables like cauliflower, brussels sprouts or broccoli. PREPARATION 1. Heat the oven to 425 degrees. Combine the gochujang, soy sauce, ginger and 3 tablespoons oil in a medium bowl or resealable bag. Add the squash, turnips and scallion whites, toss to coat with glaze, or seal bag and shake to coat. Lightly season with salt and transfer to a rimmed baking sheet. Season the chicken with salt and toss to coat in whatever is left of the glaze in the bowl or bag. Arrange the chicken pieces skin-side up between the vegetables on the sheet. 2. Roast until vegetables are tender, chicken is cooked through and the skin crispy and browned in spots, about 40 minutes. 3. While the chicken cooks, thinly slice the scallion greens. Using a sharp knife or a mandoline, cut the radishes into thin rounds. In a small bowl, toss the sliced scallion greens and radishes with the rice vinegar and sesame oil, if using. Season to taste with salt and set aside to lightly pickle. 4. Top the roast chicken and vegetables with the quick-pickled scallion-radish mix and transfer to serving plates. Serve with steamed rice, if desired. 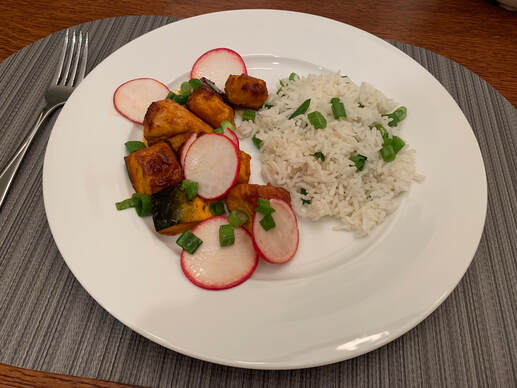 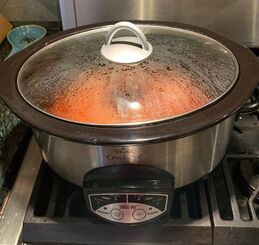 This is an easy crowd pleaser for my crew. You just need to decide to make it at least 4 hours before you plan to eat. Ingredients: Pork Loin, at least 2lbs One onion One bottle of your favorite BBQ Sauce. (We use Sweet baby Ray’s or Williamson Brothers for this recipe) ¼ cup of water 2 cloves of garlic One package of Hamburger Buns or Rolls Salt and pepper to taste Step 1: get out the slow cooker and lightly spray this inside with olive oil or Pam Step 2: Slice a large onion in to chunky slices and place on the bottom of the cooker along with the garlic. Step 3: Add the pork on top of the onions. Salt and pepper the port to taste. Step 4: Use at least 3/4 of the bottle of BBQ sauce to cover the pork. (Leave a little bit to use for dipping when you serve it.) Step 5: Add the ¼ cup of water, cover and turn on the cooker. Step 6: Cook for 4 hours. Step 7: Use two forks to break up the meat and coat it evenly in the BBQ sauce. I serve this with hamburger rolls, mashed potatoes, mac and cheese and cole slaw. You can make all of that from scratch, but if you’re like me there’s no time for that between getting home from soccer, homework and bedtime for the kids. So I use the fresh mashed potatoes and mac and cheese from the supermarket, as well as cole slaw from the deli. Sometimes I’ll make the cole slaw from scratch. Also, my youngest really likes this meal, but not all of the sauce. So I remove his pork from the cooker prior to mixing it all and serving it to the family. 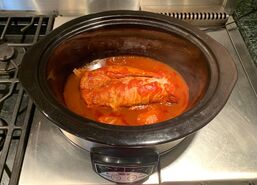 Done cooking, but before mixing. 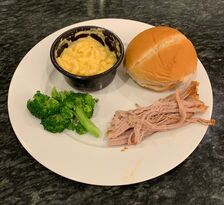 This is the "picky kid plate", with minimal sauce interaction, and not on the bread. 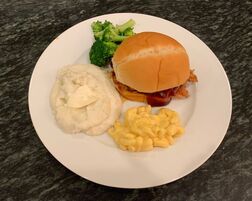 This is the "grown up" version of the plate.
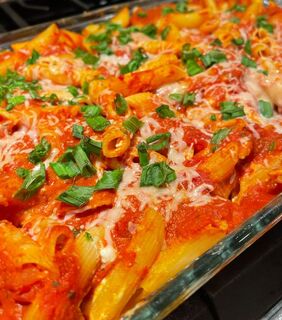 Easy Low Fat Baked Ziti This is an easy, yummy recipe that evolved over time. Plus its only one dish, which makes cleanup easy.
Ingredients: 16oz box of ziti, penne, or rigatoni One onion One green pepper 8oz of cottage cheese 8oz neufchatel cream cheese 32oz jar of your favorite pasta sauce (we prefer Michaels of Brooklyn’s Home Style Gravy) 4oz of low fat shredded mozzarella (1/2 a package) Pam or olive oil cooking spray And for this recipe, I use a 3Qt. pyrex glass rectangular baking dish Step 1: Bring a large pot of water to a boil. Add the pasta and cook as per the box instructions (usually around 11 minutes). Step 2: Place the Neufchatel cheese (still in the wrapper) near the pasta pot to help soften it to make it easier for mixing later. Step 3: Slice a medium sized onion into chunks. Step 4: Remove the seeds from the green pepper and cut in to small chunks. Step 5: Lightly spray the inside of the baking dish with Pam. Step 6: When the pasta is done cooking, drain it and then add to the pyrex dish. Step 5: Mix the pasta with the peppers and onions. Step 6: Mix in the cottage cheese, and remove the wrapper from the Neufchatel cheese to add it as well. Step 7: Once thoroughly mixed, pour the pasta sauce over the top. Mix it to make sure it is evenly distributed throughout the dish. Step 8: Sprinkle the top with the shredded low-fat mozzarella cheese. Step 9: Cover with foil and bake at 350F for 30 minutes. Remove the foil for the last 10 minutes. I am a planner. I always plan out the dinners for the week on Sunday, and then shop accordingly. With three kids each playing multiples sports and on multiple teams, when I leave work the work has just begun. When you don’t get home from the baseball field until 7:30 or 8pm and everyone’s hungry, Uber Eats is very appealing. But it’ll still take at least 45 minutes for whatever you decide on to arrive. In less than that time, I can make dinner. I have a list of recipes that have come to fill the dinner void on those nights. Sheet Pan Lemon Chicken This is my favorite because it is so easy, and I love roasted vegetables. Ingredients: ½ lb to ¾ lb baby potatoes, washed and halved ½ lb brussel sprouts, washed and halved (broccolini works great as an alternative) 1lb of chicken breasts or chicken tenders 1 T French mustard 2 cloves of garlic 1 tsp honey 1 lemon or lemon juice equivalent Salt and pepper to taste Step 1: preheat oven to 400F Step 2: Lightly coat a baking sheet with an lip or edge with olive oil. Step 3: Add the potatoes and brussel sprouts to the pan. Drizzle with olive oil (about 2T worth) Step 4: In a small bowl, whisk together the mustard, garlic, honey and lemon juice with 2T of olive oil. Drizzle half of this over the vegetables in the pan. Toss them to make sure they have even coverage. Step 5: Add the chicken to the pan. Spoon the remaining marinade on top of each piece of chicken. Step 6: Bake at 400F for 20-25 minutes. I serve this with rice on the side. I get the rice cooker going before I start with the chicken. That way they finish at about the same time. To make it even MORE working mom friendly, you can replace the rice with fresh mashed potatoes from the supermarket. And if your boys are as hungry as mine are, I always have a loaf of French bread on the side that they can warm up and slice to have with dinner. They just can’t seem to get enough carbs each day. And why do baking sheets get so nasty over time? I treated myself to a new one over quarantine and it's been so easy to keep it looking like new, and its big enough for everything I want to make. I found this half sheet pan on Amazon. 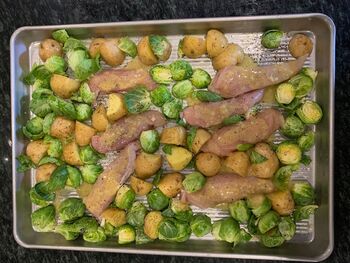 BEFORE... 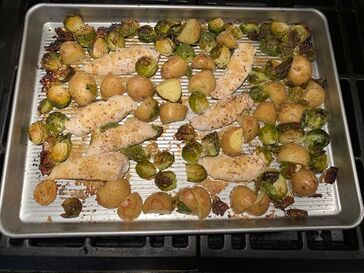 ...AND AFTER. YUM! |
AuthorKris Delaney is a marketing executive, foodie, travel enthusiast, and book nerd based in Atlanta, GA. Archives
July 2023
Categories
All
|
 RSS Feed